The is an Official Nougat update is rolling out via OTA in phase wise manner. You can manually check whether the update is available in your region or not. To check the update Go to Settings –> About Phone Section –> Software Update. Many users reported that they still not received the OTA update, so we are providing the Nougat OTA file for Honor 8 Pro with that you can Update Honor 8 Pro to Android 7.0 Nougat Manually. Follow the below Step by step guide to install B130 Android Nougat on Honor 8 Pro. Already many smartphone users are tasting the sweetness of Android Nougat with includes ZTE Axon 7, HTC 10, OnePlus 3, OnePlus 3T, Htc One M9, LG G5, Samsung Galaxy S7 Edge, Moto G4 Plus, Huawei Mate 8, and many more devices. This sweet update is loaded with many bug fixes, Performance improvements and the pack of Android Nougat features like Multi-Window Mode, Improved Notifications, Doze, Seamless update, Vulkan API, Settings UI and much more. Below you can download the Android Nougat Update and install it.
DISCLAIMER
RootMyGalaxy.net is not responsible for any damage happened to your device(s) while following this guide, Proceed at your own risk.
PRE-REQUISITES
This Update is only for Honor 8 Pro Smartphones. Follow the below Guide Exactly or else it may lead to brick your device. RootMyGalaxy.net is not responsible for any damage. We recommend to take complete backup and proceed. Maintain 50-60% battery to prevent sudden shutdown between the process.
Downloads
Update.zip update_full_DUK-L09_hw_eu.zip update_data_full_public.zip
Steps to Install B130 Android Nougat on Honor 8 Pro
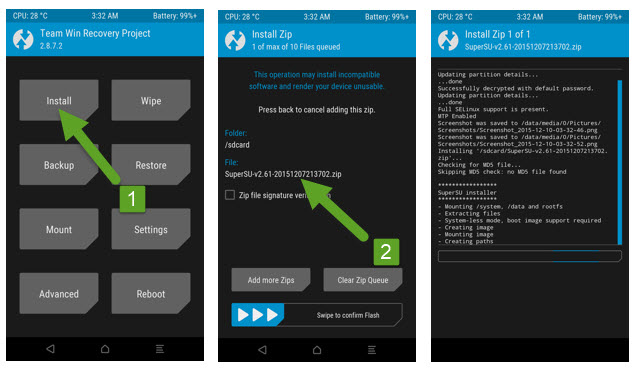
Download the three zip files from above and save the file in your device. Now press and hold the Volume Down button + Home button + Power button at the same time. As soon as your device screen goes black, immediately leave the Volume down button and swap to Volume Up button while still holding other 2 buttons. Keep the 3 buttons pressed until you get into TWRP Recovery. Click on “Wipe” in the TWRP main menu and do a “Swipe to Factory Reset” on the bottom of the screen. Now go back to TWRP main menu, Click on “Install” and select the first Update.zip file that you saved on your device in Step 1. After selecting the .zip file, do “Swipe to Confirm Flash” to begin the installation process.
(This may take some time as it is a fresh flashing process).
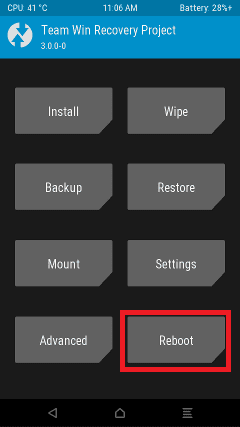
Once your Update.zipis successfully installed, click on “Wipe cache/Dalvik” option, and then do “Swipe to wipe” on the bottom of the screen. Repeat the above press for other two zip files. Once done, reboot your device from the TWRP main menu
Done!!!
Hope you found this article helpful. Let us know your feedback in the comment section below.


